

The primary reason many cold storage facilities fail to maintain optimal temperature isn't a faulty refrigeration unit — it's mistakes during wall panel installation. Cold storage wall panels are the thermal backbone of the entire enclosure, and even minor installation errors can have devastating long-term consequences for operational performance.
According to the International Association of Refrigerated Warehouses (IARW), up to 30% of excessive cold storage energy consumption stems from building envelope integrity failures rather than refrigeration system issues. This means proper panel installation is just as critical as selecting high-quality cooling equipment. Every gap, loose joint, or specification mismatch becomes a thermal leak path — causing compressors to work harder, electricity bills to surge, and stored products to face spoilage risk.
Below are the 7 most common cold storage wall panel installation mistakes and exactly how to prevent them.
1. Uneven Floor Preparation
The most fundamental mistake happens before the first panel is even lifted. Cold storage flooring must be perfectly level with a maximum slope tolerance of 3 mm per meter. Uneven floors prevent panels from locking properly into the tongue-and-groove system, creating micro-gaps that are hard to spot visually but significant in thermal terms.
Solution: Perform floor screeding with a leveling compound before installation. Verify flatness across the entire area using a laser level. For existing floors, apply a self-leveling epoxy coating at least 3-5 mm thick before starting panel installation.
2. Skipping Thermal Breaks at Floor-Wall Junctions
The junction between wall panels and the floor is the most vulnerable point for thermal bridging. Many contractors install panels directly onto concrete slabs without a thermal break, creating a thermal bridge that conducts cold from inside to outside. This also leads to ice formation at the base of walls — a common sight in poorly installed cold rooms.
Solution: Install PVC thermal break profiles or neoprene gaskets along the entire floor-wall perimeter. These materials interrupt thermal conduction and prevent ice buildup. Ensure the thermal break is at least 10 mm thick and continuous without gaps.
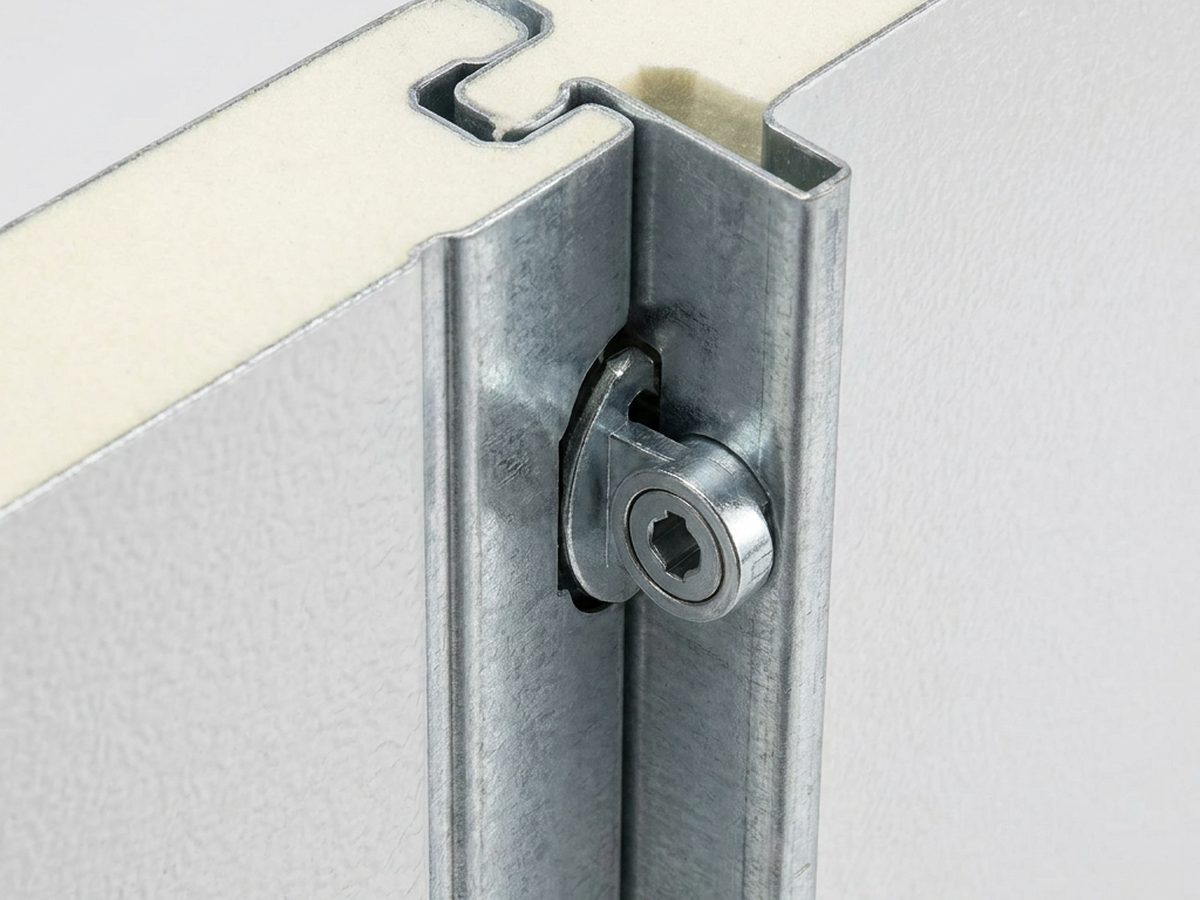
3. Inconsistent Camlock Fastener Torque
The camlock system is the inter-panel locking mechanism that determines joint tightness. A frequent mistake is over-tightening camlocks on one side while under-tightening on another, or tightening sequentially without a cross-pattern. This causes uneven pressure distribution and incomplete rubber seal compression.
Solution: Use a torque wrench with consistent settings — typically 8-10 Nm for PIR/PUR panels. Tighten in a cross-pattern starting from the panel center and working outward. Re-check every camlock after 24 hours, as materials may settle slightly and require retorquing.
4. Wrong Sealant Selection and Improper Application
Not all sealants are suitable for cold storage environments. Acrylic-based sealants crack at low temperatures, while standard silicone loses elasticity during freeze-thaw cycles. Application errors — such as filling joints when panels are still fogged with condensation or before the sealant has fully cured — are equally common.
Solution: Use food-grade polyurethane (PU) sealant with a low-temperature rating of at least -40°C. Apply when the panel surface temperature is above 5°C and humidity is below 75%. Allow a minimum 24-hour curing period before operating the cold storage. For joints exposed to wet cleaning processes, add a sanitary silicone sealant as a second protective layer.
5. Inaccurate Corner Angles and Wall-Corner Panel Alignment
Cold storage corners are the second most critical point after floor junctions. Corner panels that aren't perfectly perpendicular or have gaps exceeding 2 mm become pathways for warm air infiltration. This often happens because contractors skip using dedicated corner profiles or force-fit standard panels for 90° corners.
Solution: Use factory-fabricated corner panels with precision angles. If using standard panels, cut them with a guided circular saw at exactly 45° to form a 90° joint. Install both internal and external aluminum corner flashing for additional protection. Verify every corner with a digital angle finder before securing.
6. Ignoring Panel Thermal Expansion
Cold storage sandwich panels undergo significant expansion and contraction due to extreme temperature differences between the interior (as low as -25°C) and the exterior (30°C+ in tropical climates like Indonesia). The fatal mistake is installing panels too tightly without leaving expansion gaps, which leads to panel buckling within months of operation.
Solution: Leave an expansion gap of 3-5 mm per meter of panel length along the entire wall and ceiling perimeter. Use flexible flashing that accommodates movement without damaging the seal. For rooms with high temperature fluctuations — such as blast freezers — consult the panel manufacturer for specific expansion calculations based on your operating temperature range.
7. Skipping Smoke Tests and Thermal Imaging After Installation
Many contractors consider the job done once panels are up. But micro-leaks aren't always visible to the naked eye. Without testing, a cold storage facility can operate for months at substandard efficiency without the owner ever knowing.
Solution: Conduct a smoke test along all panel joints — smoke will be drawn toward leak areas due to pressure differentials. Follow up with thermal imaging using an infrared camera to detect cold spots indicating thermal leakage. Document all results as a baseline for periodic inspections. Schedule these tests annually as part of preventive maintenance.
Installation Checklist Summary
- Ensure floor is level (tolerance ≤ 3mm/meter)
- Install PVC/neoprene thermal breaks at all floor-wall junctions
- Use 8-10 Nm torque wrench for all camlocks in cross-pattern
- Select low-temperature food-grade PU sealant (-40°C), 24-hour curing
- Verify corners with digital angle finder, max 2mm gap
- Leave 3-5mm expansion gap per meter of panel length
- Perform smoke test and thermal imaging after installation
- Document baseline for periodic inspections
FAQ: Common Questions About Cold Storage Panel Installation
What's the main difference between installing PIR vs PUR panels for cold storage?
PIR (Polyisocyanurate) panels require more careful handling due to higher rigidity but deliver superior insulation performance. PUR (Polyurethane) panels are more flexible during installation but more susceptible to deformation at temperatures above 80°C during the foaming process. Both use the same camlock system, but PIR generally needs smaller expansion gaps due to better thermal stability. For deep-freeze applications below -18°C, PIR is the recommended choice.
How long should it take to install cold storage panels for a 6×8 meter room?
With an experienced 3-4 person team, complete wall and ceiling panel installation for a 6×8 meter cold storage room should take 5-7 working days. This includes: floor preparation (1 day), wall panel installation (2-3 days), ceiling panels (1-2 days), and sealing/finishing (1 day). Challenging site access or extreme weather can add 1-2 days to the schedule.
Can cold storage panels be relocated after installation?
Yes, the modular sandwich panel system allows for relocation. However, the process requires: (1) removing all sealant carefully, (2) opening camlocks without damaging threads, (3) labeling each panel for proper reassembly, and (4) replacing all seals and gaskets with new ones. Never pry panels apart as this damages the tongue-and-groove system. Estimated relocation costs typically run 40-60% of the original installation cost.
Conclusion
All seven mistakes outlined above are preventable with proper planning, correct material selection, and experienced installation teams. Investing in correct installation upfront yields long-term operational savings — from lower electricity bills to extended cold storage lifespan and reduced product spoilage.
Need consultation for your cold storage wall panel installation project? Our technical team is ready to assist from planning through to completion. Contact us now to schedule a free site survey.